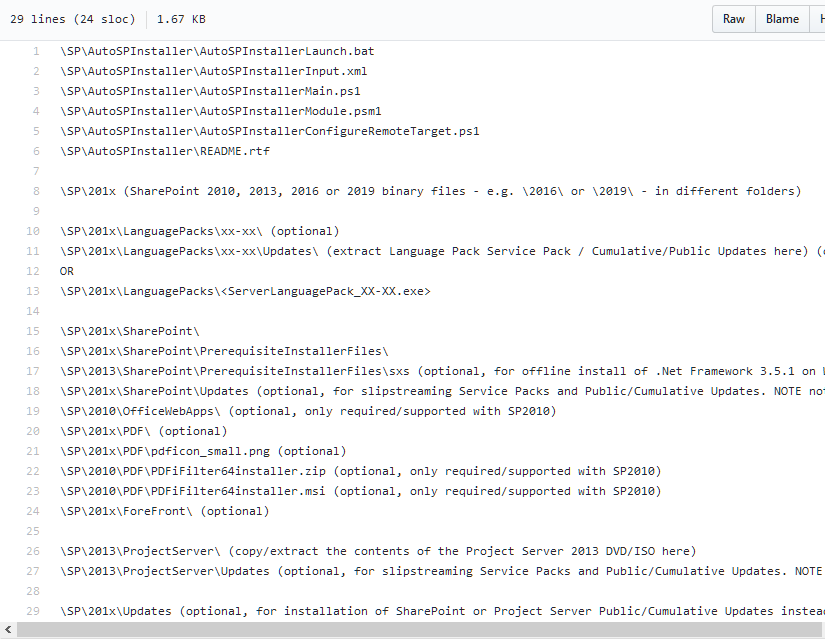
The auto SP Installer download used to include the folder structure. That is no longer the case.
Let’s say you wanted to install SharePoint 2019, you need to create a directory at the same level as your AutoSPInstaller Directory, named 2019. This next image shows the two directories:
Then you need to get the binaries, and make sure that the required default folder structure is present. You can see the default folder structure at this link. Anything that is not marked optional is required. This next picture shows the folder structure
In this next picture, we see that the SharePoint Binaries have been copied into the SharePoint directory that we created inside of the 2019 Directory. Notice how in the above picture that the YYYY\SharePoint directory has an Updates Directory? Well, you dont need to worry about creating that directory because the download of the binaries already includes that Updates directory at YYYY\SharePoint\Updates
After you have downloaded the AutoSPInstaller files, you need to save them in the directory. Notice in the image below that there is a file named 2019Farm. That file was created by copying the xml from the autospinstaller.com site
Download the AutoSPInstaller Files click here
Click Clone or Download
Click Download Zip
Then after everything is all set, all you need to do is drag and drop the 2019Farm.xml file onto the AutoSPInstallerLaunch.bat file in order to run the installer.
A couple of “Stump the Chump” points:
Before you run the launcher, make sure that the .xml file does not contain any references to contoso. You can find and replace.
Also make sure that the searchcontent account password is input, it is down under the search service application.


You must be logged in to post a comment.