PowerShell to create the host named site collection web application and top site
This post is step 1 of two steps to get host named site collections off the ground in your SharePoint.
NOTE THIS IS NOT THE BEST RECOMMENDED APPROACH BUT IT WORKS….So if you just want to create HNSC and not understand, then this post is for you. I am writing a better post that explains using the IP address or a SAN cert, this upcoming weekend, May 10, 2020 and will post a link here once it is done.
In this script you need to edit the following variables, and any references to your domain
$servers
$applicationPool
$serviceAcct
$webApp
$webAppURL
$contentDB
$primarySiteCollectionOwnerAcct
$PrimarySCOwnerEmail
$SecondaryOwnerAcct
$SedondaryOwnerEmail
$webApp0URL
Essentially, you replace wingtip with your domain name, and .com with your tld if you have a different top level domain
Also pay attention to the service account, that it is the correct name
#################################################################
## Written by Stacy Simpkins ##
## for ##
## Free Sharing ##
#################################################################
$Servers="2016APPSRCH","2016WFEDC"
$applicationPool = "HNSC-ApplicationPool"
$ServiceAcct = "wingtip\2016SP_Site_AP"
$WebApp = "SharePoint - HNSC"
$webAppURL = "https://hnsc.wingtip.com"
$contentDB = "PROD_WSS_Content_HNSC"
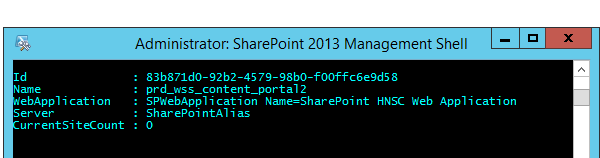
Write-Host "`nCreating Database named: $contentDB"
#Creates the web application and top site, this is a one-time only action and this site is never used
#Web application creation
Write-Host "`nCreating Web Application named: $WebApp"
New-SPWebApplication -ApplicationPool $applicationPool -ApplicationPoolAccount $serviceAcct -Name $WebApp -URL $webAppURL -Port 443 –AuthenticationProvider (New-SPAuthenticationProvider) -databaseName $contentDB -securesocketslayer
Write-Host "`nWeb Application named: $WebApp is created"
Write-Host "`nCreating Top Site for Web Application named: $WebApp"
$primarySiteCollectionOwnerAcct = "wingtip\stacy"
$PrimarySCOwnerEmail = "stacy@wingtip.com"
$SecondaryOwnerAcct = "wingtip\2016sp_installer"
$SedondaryOwnerEmail = "2016sp_installer@wingtip.com"
$webApp0URL = "https://hnsc.wingtip.com"
#Top site creation
New-SPSITE -URL $webApp0URL -owneralias $primarySiteCollectionOwnerAcct -owneremail $PrimarySCOwnerEmail -SecondaryOwnerAlias $SecondaryOwnerAcct -SecondaryEmail $SecondaryOwnerEmail -Template STS#1
$fqdn=$WebAppUrl -ireplace "(http://|https://)",""
#Adds the binding in IIS
function Add-HostHeader($a,$b) #$SPWebebAppName,$fqdn
{
Import-Module WebAdministration
#Adds https binding with host header on a given web site
# PowerShell v2 doesn't support SSL Hostheaders. Using appcmd instead.
$AllArgs=@("set","site","$a","/+bindings.[protocol='https',bindingInformation='*:443:$b']")
&"C:\Windows\System32\inetsrv\appcmd.exe" $AllArgs
} #End function
#Adds https host header to $SPWebAppName on all servers (SharePoint does not add automatcially)
Write-Host "`nAdding HTTPS host header"
Invoke-Command -ComputerName $Servers -ScriptBlock ${function:Add-HostHeader} -ArgumentList $WebApp,$fqdn
Write-Host "`tHTTPS host header successfullly added on $servers"
After you run this you need to run the script to create the host named site collections
The script that creates the new host named site collections can be found at this post.