
Running SharePoint sites on Secure Socket Layer (SSL) is critical to information security and SharePoint Central Administration is no exception. You can configure central admin to run on SSL by creating a CName record in DNS that resolves to your server(s) that host central admin. If you’re going to load balance it, make sure you use source address affinity on that Load balancer.
The only pre-requisite is a wildcard certificate installed for computer account for each server in the farm.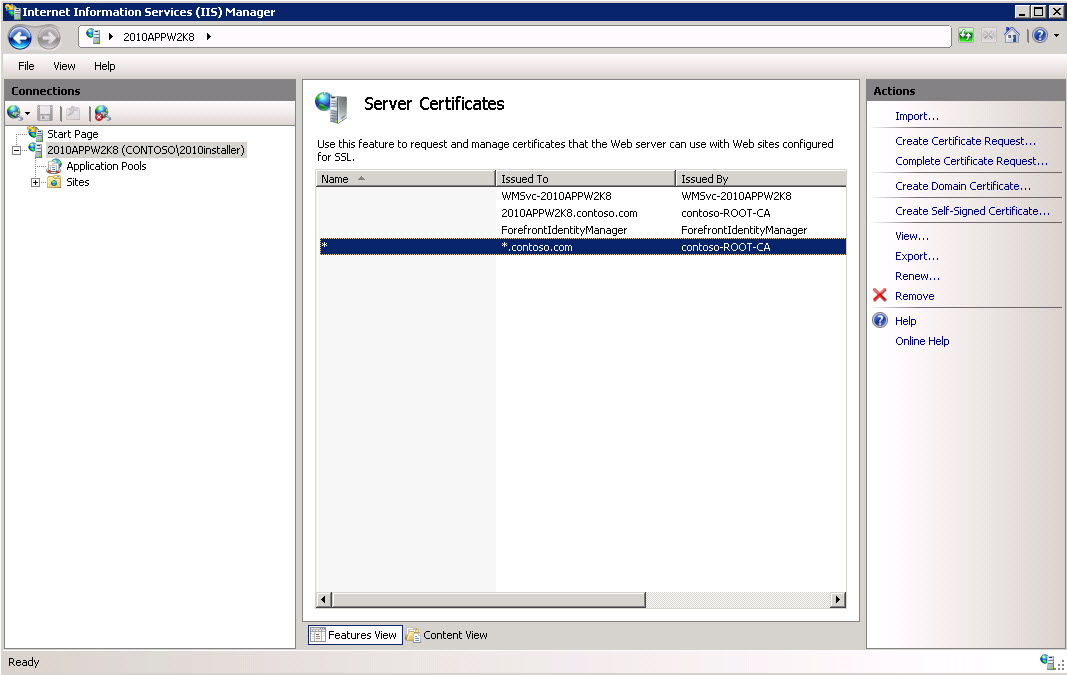
One word of caution: if you’ve already configured User Profile Sync, you should think twice before doing this, as it is best to configure central admin with the vanity URL before you configure user profile service.
After you’ve got it running on SSL, you might want to give the servers who don’t run SSL a hosts file entry that points them to the servers that are hosting Central Admin. And, you’ll want to give them the registry multi-string discussed further on in this post. You’l also want to update SharePoint’s SecureBindings so that if central admin is moved to another server at a later date, that your settings move with the site.
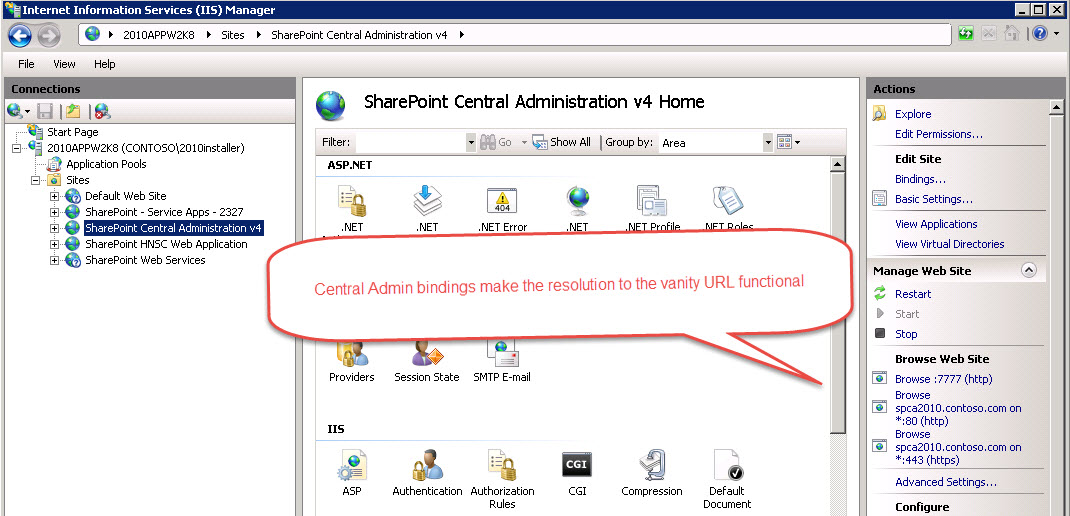
Ok, let’s get started, open Central admin, and then open Internet Information Services Manager (inetmgr.exe)
In inetmgr, go ahead and set binding for central admin host name vanity url on the Central Admin site. Create a binding on port 443 with a host name of your choosing (e.g. spca2010.contoso.com), assign the wildcard certificate, and create a non-SSL host name (spca2010.contoso.com) binding on port 80, as well. Also, you should make sure there is a binding for the high port (e.g. 7777) is still present in IIS administration.
No let’s hop over to Central Administration and verify that the alternate access mappings (AAM) are correct. We’ll need to modify the default AAM to point to the new name. We also need to set an off box termination in central admin (e.g. create AAM’s that resolve the http://vanityname to the https://vanityname, for all of the following: servername: port, servername.fqdn: port, and just the name. (e.g. http://Servername.Contoso.com:7777, http://Servername:7777, and http://Vanityname.FQDN)
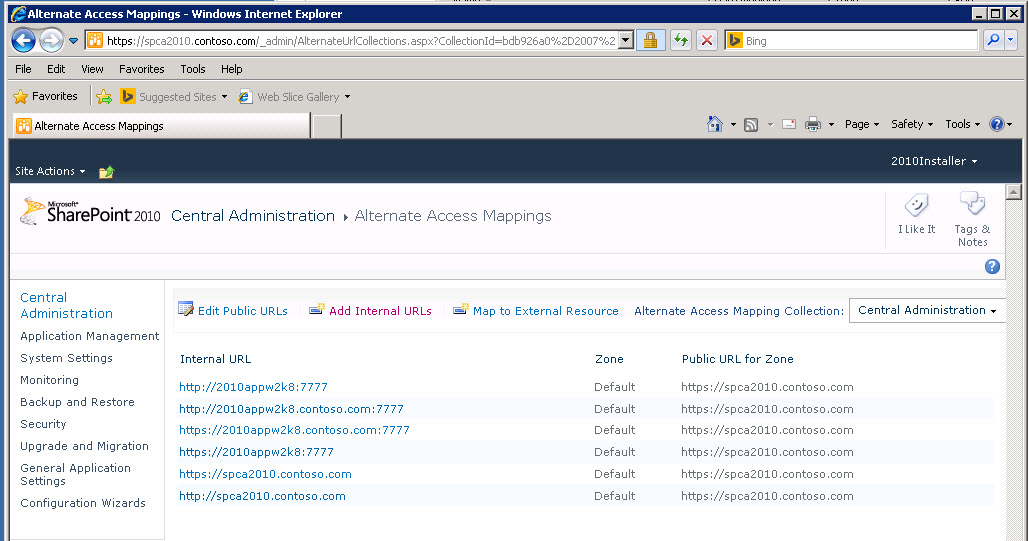
In other words, add internal urls, for servername: port, and servername.fqdn: port. For both SSL and non-SSL, and one for just SSL and Servername (https://servername) this one is very important as it helps Central admin open after Psconfig is ran in the future.
When you set central admin to run on SSL and a Vanity, another nice thing that you want to do is – – – make it so the Central administration shortcut resolves to the new vanity url, across SSL, when it’s clicked.
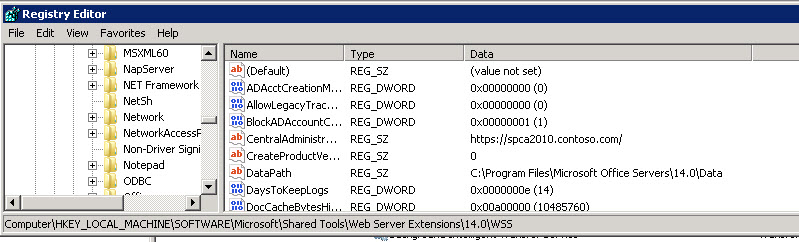
After you make the change tot the default entry, go into registry and make sure that it took. To do this you simply make sure that the following registry entry named CentralAdministrationURL shows the
SharePoint central admin shortcut:
HKLM\SOFTWARE\Microsoft\Shared Tools\Web Server Extensions\15.0\WSS
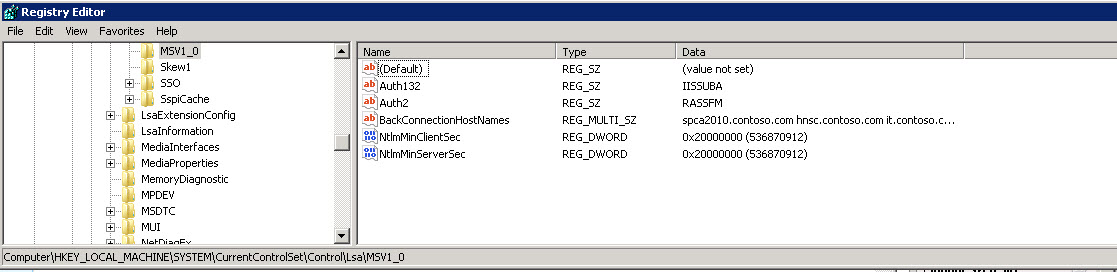
Since you’ve got registry open, you might as well take this time to make it so you never run into an endless loop of prompting when accessing central admin via the vanity URL. Add the central admin vanity URL to the BackConnectionsHostNames multi-string reg property that you’ve created for SSL communication.
If the property doesn’t exist go ahead and create under HKLM\SYSTEM\CurrentControlSet\Control\Lsa\MSV1_0
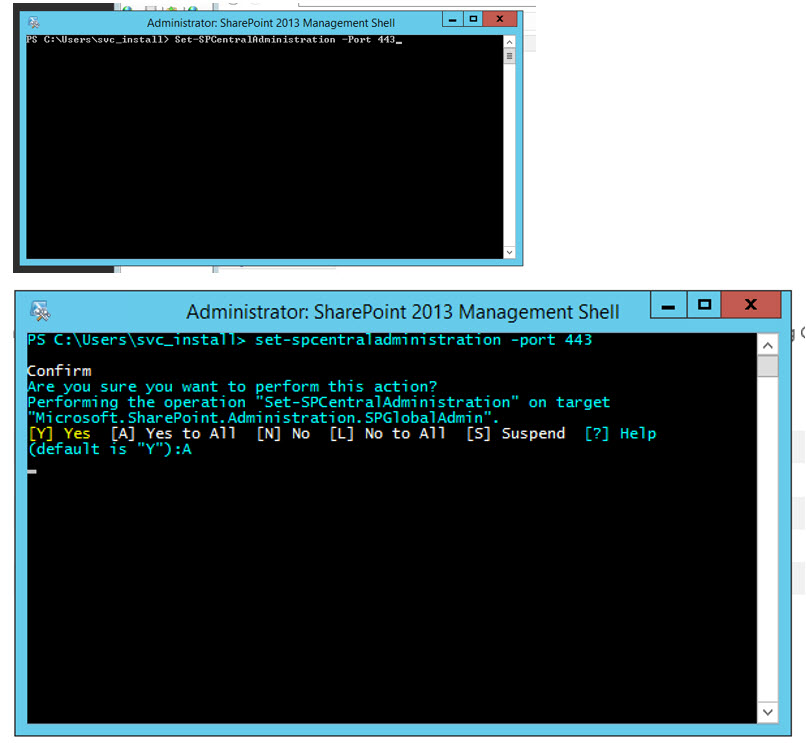
Run Powershell command and double check registry
Set central admin to run on SSL and make sure registry location is correct for SharePoint central admin shortcut
When you first install central admin to run on high port (which is the recommended best practice), then all you need to do is add the Cnames and bindings before running this PowerShell to set Central Admin to run on SSL
Set-spcentraladministration -port 443
After running the command, you need to check the reg key for the central admin shortcut and IIS bindings.

Have you ran PSCONFIG lately? Make sure you didn’t get dorked by the Powershell**
Sometimes running the PowerShell or running PSConfig will change your IIS bindings or dork up your AAM’s. And I’ve also seen this modify the CentralAdministrationURL registry setting.
**Important to remember when installing patches.
Go Back to your AAM’s and, if needed, reset default AAM for Central admin back to spca.contoso.com (they most likely have changed after your patch psconfig), the default AAM is the one that says https and server name, most likely. It definitely is the AAM where the delete button is greyed out. Once you do that – recreate the rest of them, if needed, then reset IIS (c:\IISreset) and make sure the https with servername and no port AAM (and the others) are all there after you reset. You’ll also want to make sure that the Central Admin site in IIS retained your bindings.
What if Central Admin moves servers and how to I stop the psconfig from dorking up these settings? (special thanks to Mark Kordelski for this section)
This “is related to a step that a lot of people leave out when converting web apps to SSL. Internally, SharePoint maintains a list of the IIS bindings used for the web app. This is used by SharePoint any time it has to build/rebuild IIS settings when starting the Micrsoft SharePoint Foundation Web Application service. If a new server is added to the farm at a later date or if central admin is added to a new server, the correct IIS bindings will automatically be added to the new server’s IIS configuration.
Unfortunately, this does nothing for any already-created IIS instances, so for the IIS instances which already exist, we still have to manually add the SSL bindings. As you might know, if your WFE’s IIS settings ever get dorked up, you can stop and restart the SharePoint Foundation Web Application service for that server in Services on Server. Stopping the service removes all IIS settings from that server.
Starting the service adds all of the IIS settings. If you have properly maintained your internal SharePoint binding settings, then when SharePoint configures IIS, you won’t have to go back and manually add/remove bindings again. So, if someone later removes Central Admin from one server and puts it on another, having this internal binding setting in place will prevent the admin from having to manually add the SSL binding (and/or removing the HTTP binding) on the new server.
The lack of the missing internal binding settings could also be what causes those problems when the post setup configuration wizard after making your changes, but each case is not always the same, so some testing would be needed to confirm.
Alas, the next obvious question is: How do I add this internal binding in SharePoint?
Using SharePoint Management Shell, you would start by getting a reference to the web application, and then use it to get a reference to the “Default” zone’s IIS Settings (depending on how complicated your AAMs are, you may need to repeat this process for other zones):
$wa = Get-SPWebApplication -Identity [Central Admin URL]

$dz = $wa.IisSettings.Item("Default")
From here we can inspect the default zone’s bindings. There is a separate secure (.SecureBindings) and insecure (.ServerBindings) binding collections.
We should be able to see the insecure bindings via:
$dz.ServerBindings
and the secure bindings via:
$dz.SecureBindings
We will likely see that there are not yet any secure bindings so we need to add one.
$nb = New-Object Microsoft.SharePoint.Administration.SecureBinding
We should probably add the host header of the vanity URL in the .HostHeader property of the new secure binding.
$nb.HostHeader = "spca2010.contoso.com"
Now we can add the new binding to the default zone and commit those changes (and “the jury is still out” on if the .Update() is necessary):
$dz.SecureBindings.Add($nb) $wa.Update()
In cases where a SharePoint web application will no longer be supporting the insecure bindings (where they want to only use HTTPS), we can clear the default zone’s insecure bindings:
$dz.ServerBindings.Clear()
” – Mark Kordelski
and I recommend that you should leave it there if you’re not sure and just run up the Alternate access mapping that has http mapped to https, as shown above.
Finally let’s Test it
- Now close out of your browsers
- Click the shortcut to central admin, it should open to your vanity URL
- If your account is a farm admin, try opening the vanity URL from your client
- Check user profile synchronization service is still running, (services on server), perform a test sync
Troubleshooting
- Check DNS
- Check that central admin site is a member of Local Intranet sites on the server (internet options > security> Local intranet > advanced…)
- Check registry
- Check bindings
- Check that you can sync user profile service, and again, changing the vanity URL is best performed before you set up user profile service application. That being said, you should still get central admin running on SSL, if it’s not, and then just forego the Vanity URL, unless you want to recreate user profile service.
Cheers,

You must be logged in to post a comment.